Taking a pro photo solo and easy editing tips

IMG_5430.JPG

Most of you probably do not know I take all my photos with my iPhone and when Thomas (my hubby) is not around to take them for me, I have a super easy way to take them myself. Here’s how I do it!


IMG_5416.JPG

Step 1

choose a area that has good natural light to creat your photo shoot. If you can, try to avoid direct sunlight.


step 2

I create a homemade tri pod like stand that gives you the angle you’re looking for. I usually use a stool or a chair then grab an object you can lean your phone on like a candle, water bottle or lotion. You want something that weighs enough to hold up your phone.


IMG_5423.JPG

Step 3

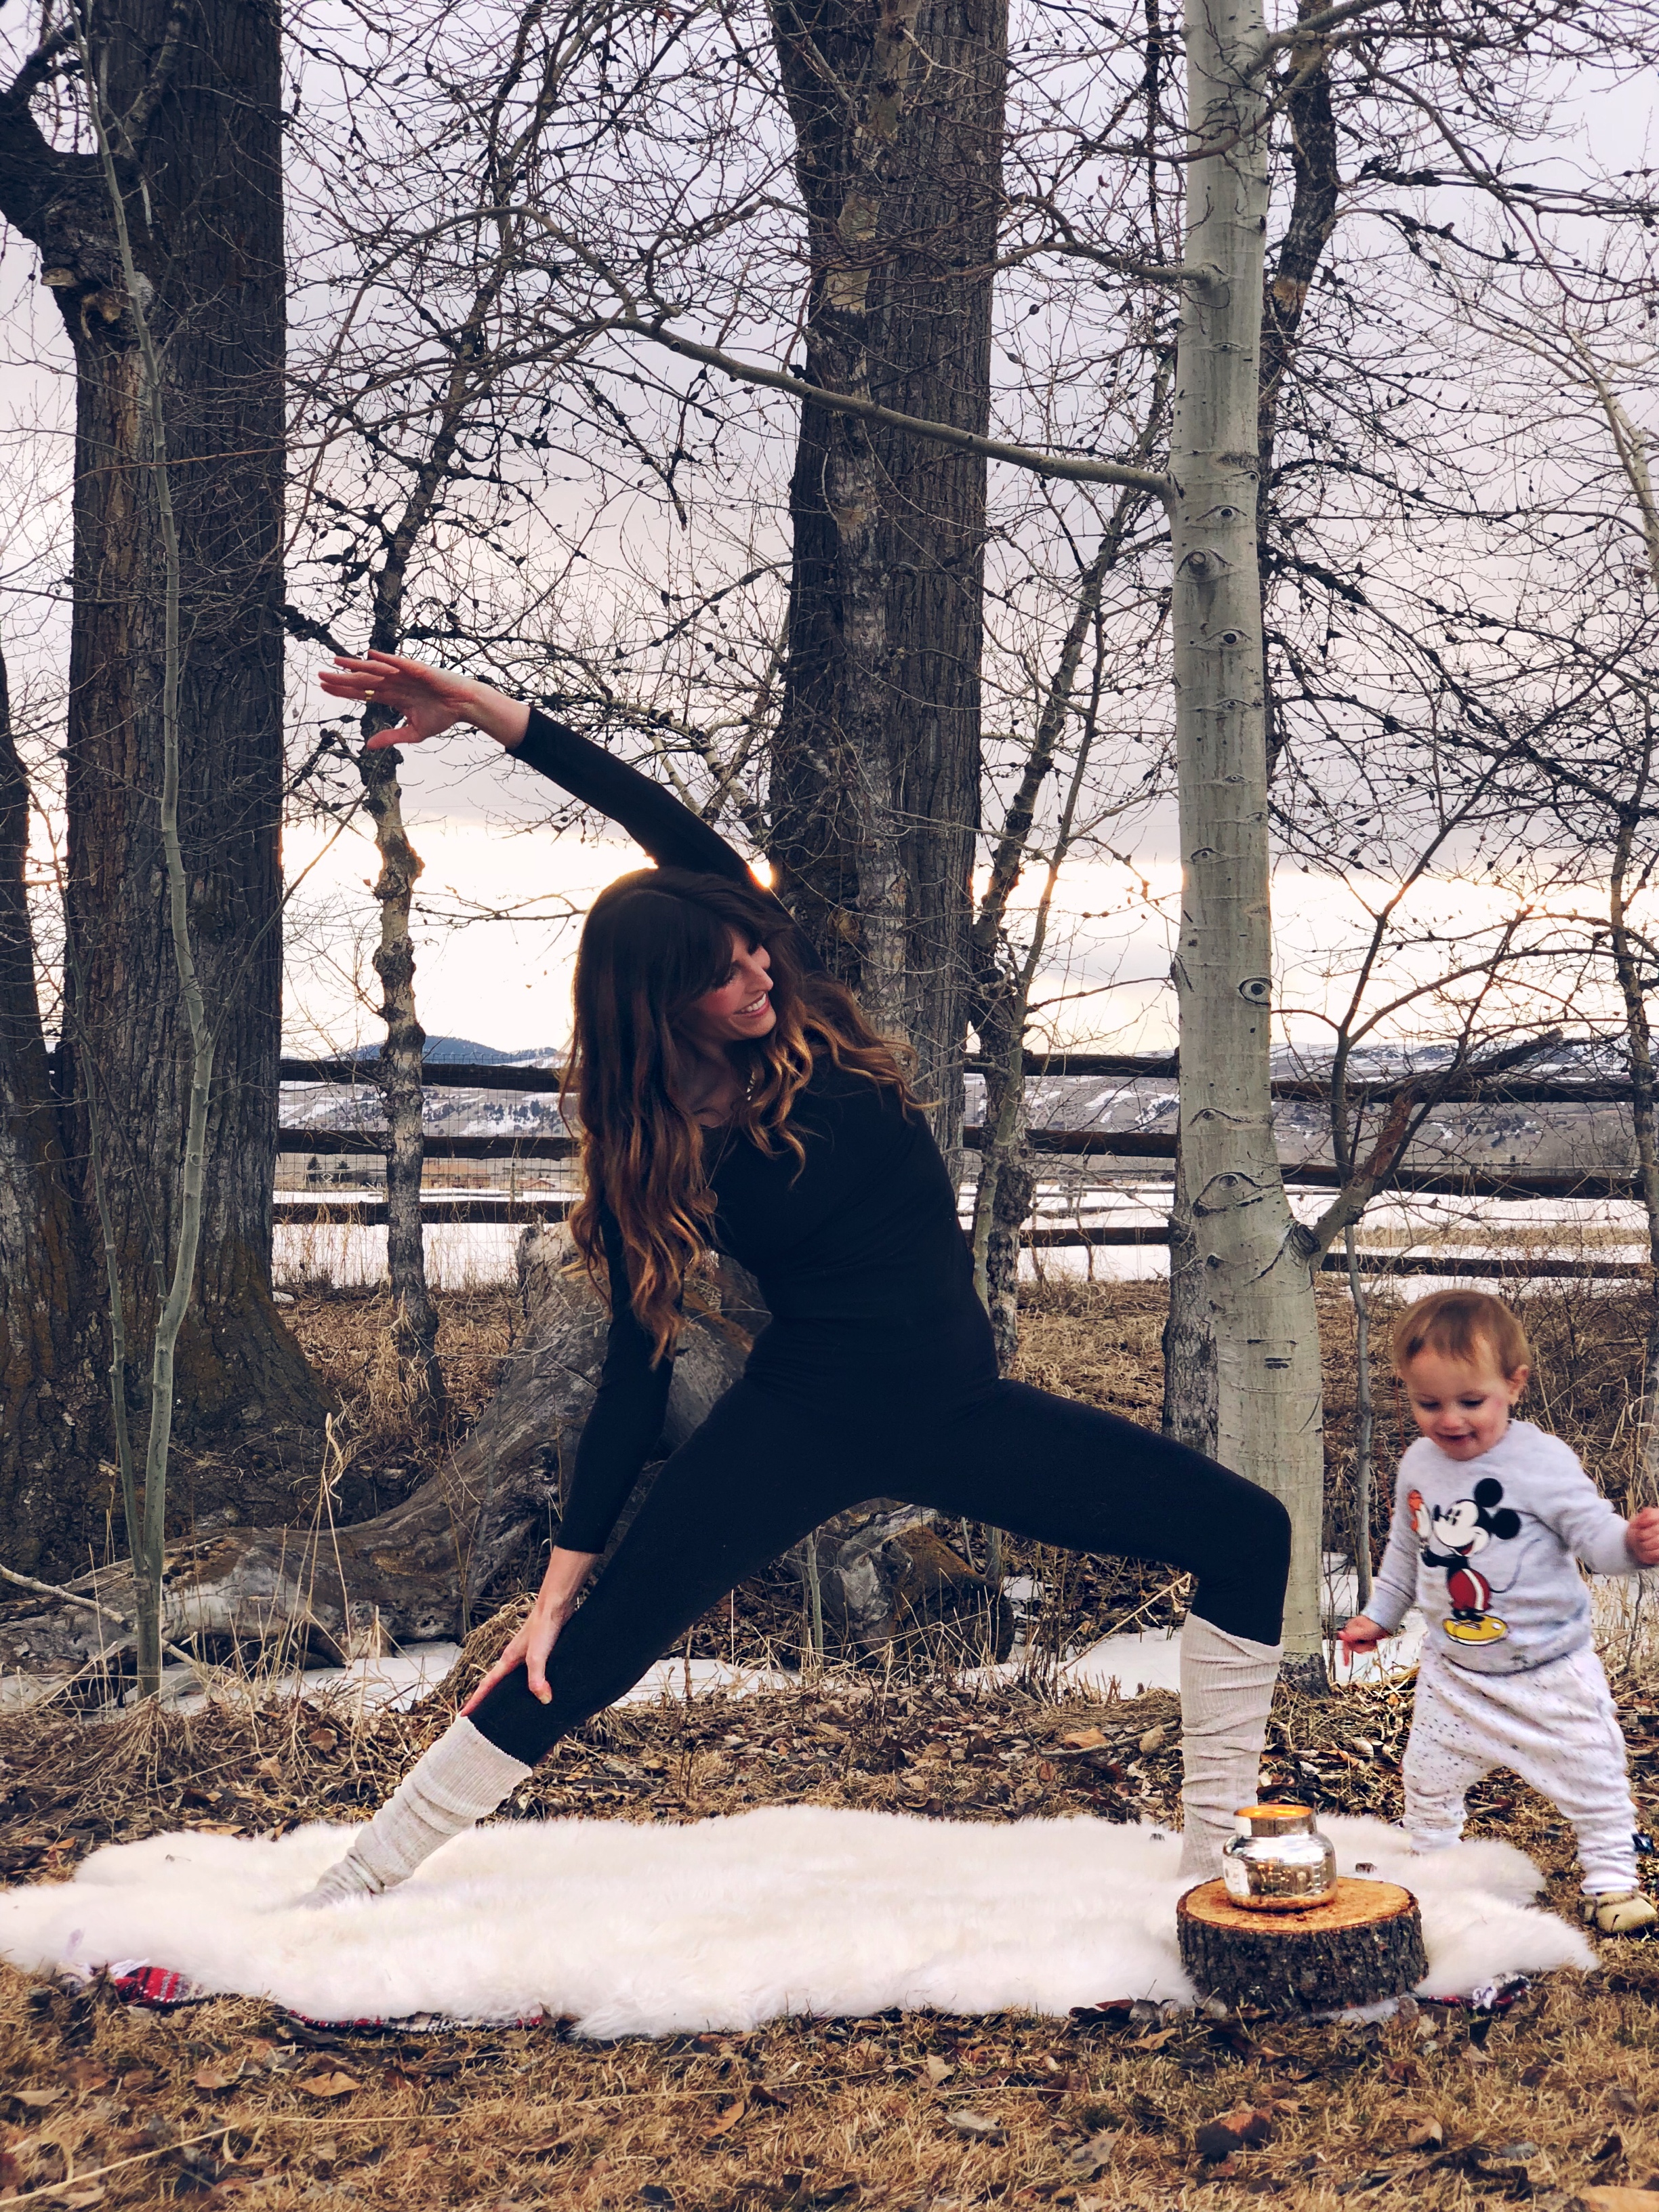
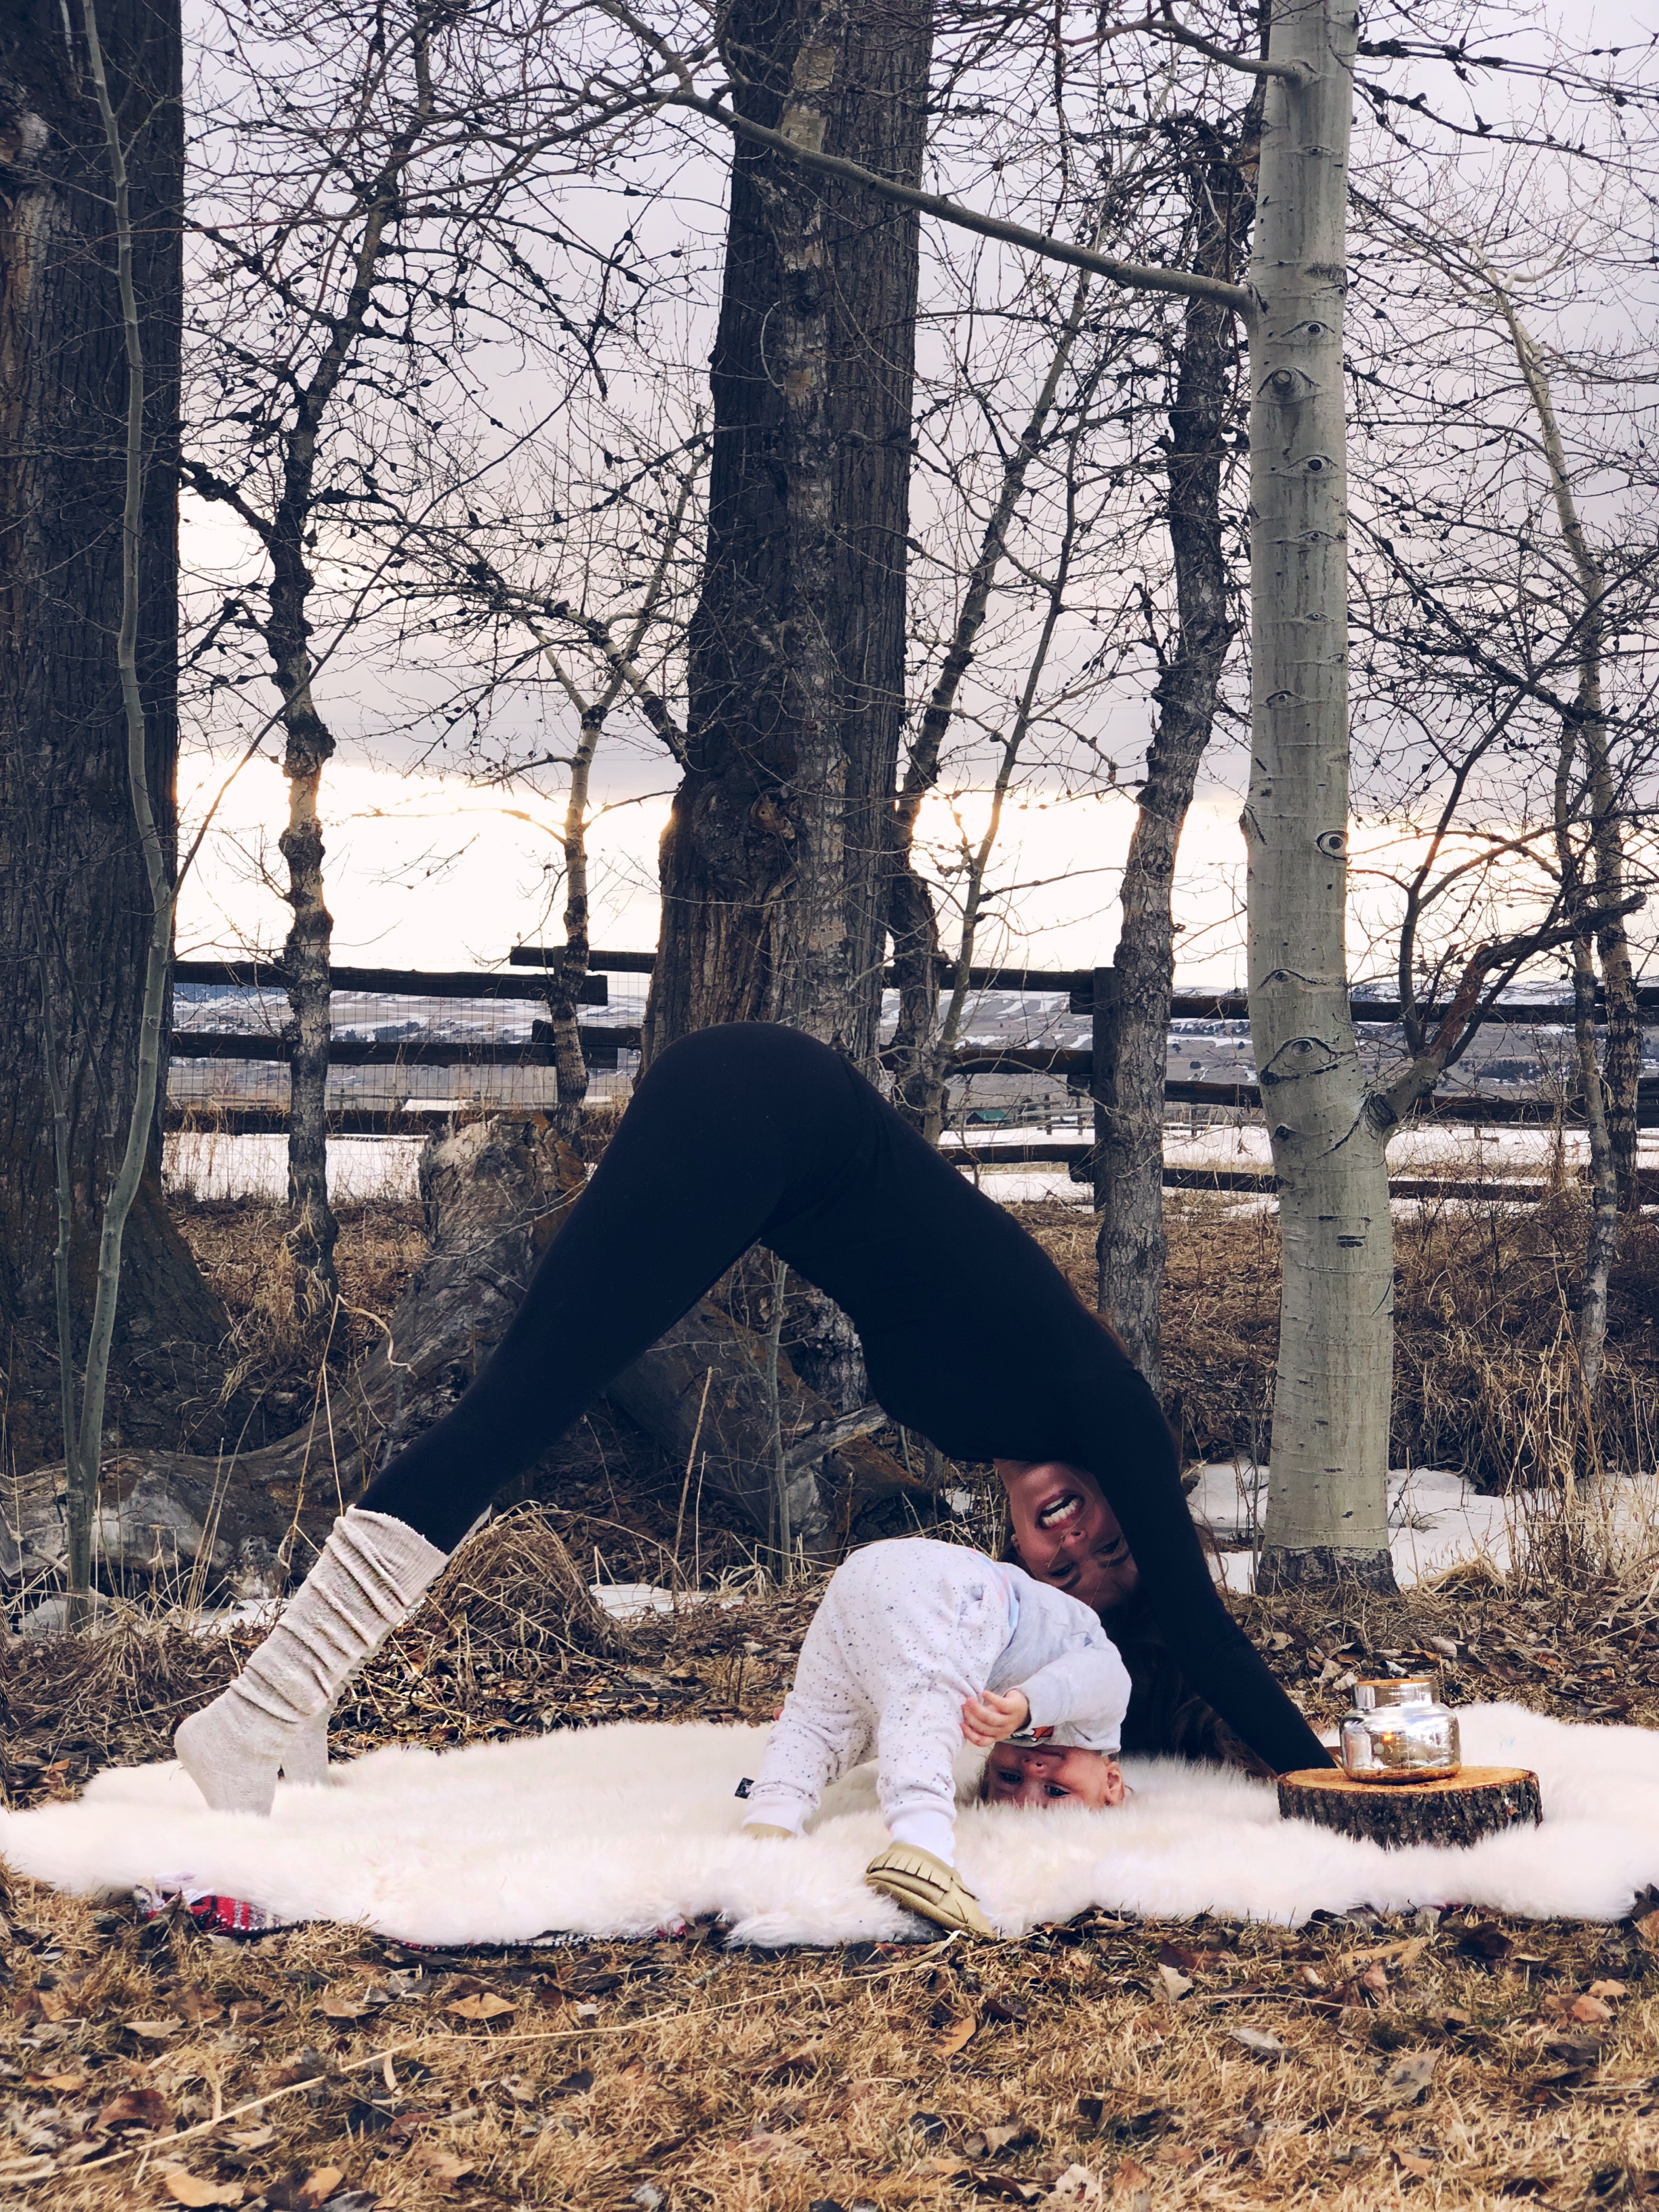
Set your phone to video and start recording (tip: make sure your camera lens is whiped clean) then prop your phone up and make sure you have it pointed in the right direction and angle. Now, do your thing in front of the camera, have fun with it and get creative! After all, no one is watching ;) In this case, I did a headstand with my little 18 month boy River. I got in my pose, laughed with river, moved around in the pose a bit then press stop when you’re finished.  My total vid was about one minute thirty seconds. 


IMG_5424.JPG

Step 4

Watch your video then when see the best moment captured press pause. Now, you want to screen shot that moment. With my iPhone I have to tap the screen to get the play symbol/overlay to go away so the entire screen is just the photo, like bellow. Take a screen shot, now you’re ready to edit.


IMG_5425.JPG
IMG_5431.JPG

Step 5

i use the app VSCO to edit all my photos. It has a nice selection of filters with options to purchase more. My personal favorite are the the numbers like 7 and the A category like A6. Import your photo into VSCO, put your preferred filter on the photo. You can adjust the strength of the filter with the bar down below if needed then I adjust my exposure. I usually always brighten my photo. I then play around with the temperature, I usually warm it up a bit then sharpen it to right amount you think looks good. 


There you go! You should have photo that looks professional and ready to post! How did it turn out? I would love to see your photos, tag me on Instagram @sheandwolf.

i find that I get multiple photos and when it involves my kids, I capture real moments because you feel like the camera is not even rolling. 

Have fun with it and let me know if you have any questions. 


Xx

Jess

Sheandwolf


Tone up in 5 minutes with 10 yoga poses

Hi friends! I’ve put together 10 poses in this yoga routine for all levels and it will only take you 5 minutes. This routine is a full body strengthening and toning routine that will leave you feeling energized but more calm and collected when finis…

Hi friends! I’ve put together 10 poses in this yoga routine for all levels and it will only take you 5 minutes. This routine is a full body strengthening and toning routine that will leave you feeling energized but more calm and collected when finished.  All you need is a comfortable place on the ground, clothes you can move in and your breath. What I would like you to focus on, is how you breath. Take deep breaths in through your nose then out through your mouth. Each time you breath like this, your body will fill with oxygen letting your body loosen up. Don’t worry so much about how the pose looks, concentrate on your breath then everything else will flow. Each pose, take at least three big breaths before you move into the next. Move how it feels good to you, do not worry about doing it perfect or looking perfect. Move into your body, what feels nice. Each time you practice, you will get better :) Let’s get started!

IMG_2799.JPG

POSE 1

PLANK POSE 

Photo above. Start out in your plank pose. Try to engage your core, slightly drawing your navel to your spine. Buns level, not too high or too low from the ground, hands shoulder width apart andshoulders over hands. Iwant you to hold this for one minute or ten deep breaths. If it feels nice to sway a little from side to side, do that :)


POSE 2SIDE PLANKFrom your plank pose, slowly start to shift your weight into your right hand, lifting your left arm up towards the sky, square off your hips so they are parallel with your legs, engage your core. Now, take three deep breaths. You can…

POSE 2

SIDE PLANK

From your plank pose, slowly start to shift your weight into your right hand, lifting your left arm up towards the sky, square off your hips so they are parallel with your legs, engage your core. Now, take three deep breaths. You can keep your arm straight up or for a bit more of a stretch through your side reach that arm over your head (photo below).  Once you are done with your breaths on this side, slowly come back to center plank. Repeat on the other side, start shifting over to your left side.

IMG_2814.JPG
POSE 3UP DOG/MERMAID POSEPhoto above. once you have finished both sides of your side planks, come back to your plank. Start to lower your hips towards the ground, bending your elbows straight back. Once your hips touch the ground, press your palms i…

POSE 3

UP DOG/MERMAID POSE

Photo above. once you have finished both sides of your side planks, come back to your plank. Start to lower your hips towards the ground, bending your elbows straight back. Once your hips touch the ground, press your palms into the ground and press your upper body up, like a mermaid would look :) Take three deep breaths here.  

IMG_2818.JPG

POSE 4

CHILDS POSE

Pictured above. Once you’re done with your up dog, come onto all fours then lower yourself to sit back on your heels. Open your knees up and shoulders to relax and settle into the ground. If you feel uncomfortable you can always rest on your elbows as well. Take three deep breaths, each time, relaxing closer into your stretch.


IMG_2804.JPG
IMG_2806.JPG

POSE 5

MEDITATION POSE

Photo above. From child’s pose, slowly start sitting up by walking your hands towards your hips till you are sitting up on your heels. Take a big breath, sit up off your heels so you’re just on your knees, reaching arms up towards the sky, big inhale here. Once your hands reach the top, place your palms together coming to sit back into your heels. Place your hands in front of your chest, like in prayer. Now take three deep breaths. In through nose out through your mouth.  

IMG_2800.JPG

POSE 6

DOWN DOG


Photo above. From prayer pose, go onto all fours. Lift your hips, straighten your arms and press back to your down dog. Three deep breaths here. If it feels nice to keep a bend in your knees then that’s okay, your hamstrings can tend to feel tight in this pose. Then, slowly walk your feet up towards your hands until you are in your forward fold. (Photo below)

IMG_2807.JPG
IMG_2808.JPG

POSE 7 

FORWARD FOLD

Photo above. Once you are in your forward fold, hang like a rag doll. If it feels better to put a slight bend in your knees do that. Hang here and take your three breaths. If it feels nice to sway from side to side or clasp both elbows, do it. Do what feels good to you. Then slowly start to roll up to stand, one vertibrate at a time. Once your head gets to the top, slowly start to reach your arms out to the side taking a deep breath, reaching your arms out towards the sky. (Photo below)

IMG_2809.JPG
IMG_2811.JPG

POSE 8

SUN SALUTATIONS  

Photo above. From standing, make sure your feet are should width apart, slowly start to fall forward, bend forward into your forward fold. Then take a big inhale while unrolling back up to stand, reach arms out and up towards the sky. Once you get to the top fall forward into your fold again. This is your sun salutation. Do 5 to 10 of these taking nice easy deep breaths each time. 

IMG_2812.JPG

POSE 9

CHAIR POSE

 Pictured above. Once you’re done with your sun salutations, while standing, settle into a chair pose making sure your feet are still shoulder width apart. Bend your knees and sit back, reaching your arms up and chest drawing forward. Try not to let knees jut out past feet, try to keep knees over feet, keeping your weight back. Stay here for ten breaths or if you want you can lower and lift. Come up to stand then settle back into chair, each time sinking lower. When done, come up to stand. 

IMG_2798.JPG

POSE 10

STANSING MEDITATION POSE

Photo above. Reach arms up towards the sky, once your palms get to the top, place them together in prayer then slowly lower them down to the center of your chest. Close your eyes, take three deep breaths and really take your time here. Slowly float your eyes open, you’re done!!! 


I hope you enjoy and feel better afterwards. The goal is to feel good, energized but calm.  Let me know how you feel and if you have any questions. This routine is for all levels but I will be sharing more routines that work on more advanced poses like dancer, shown below. It’s such a fun, empowering pose and I want to teach you how to do it!

enjoy! 


xx

Jess

IMG_2813.JPG